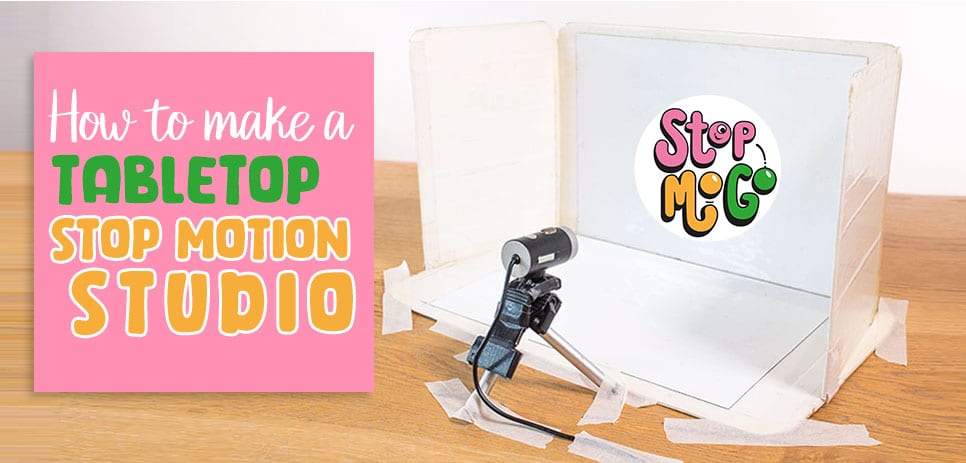
If you are wondering how to set up for stop motion at home or school, a tabletop studio like this will make animating a lot easier. If you cover it in plastic film (more on that below) it will last you a long time.
I developed these tabletop studios for my workshops. They are light, sturdy, portable, quick to set up and easily folded and stored away when not in use.
Benefits:
A place to secure background sheets
Controls outside light
Avoids getting people who are passing by in shot (especially helpful if you are in a classroom!)
Helps you focus in on animating your own little world
You can also clip on the lights I recommend in this post
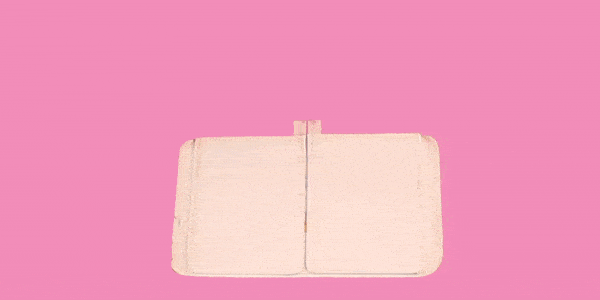
Velcro tabs to attach the sides to the base. Also included are magnetic whiteboard sheets.
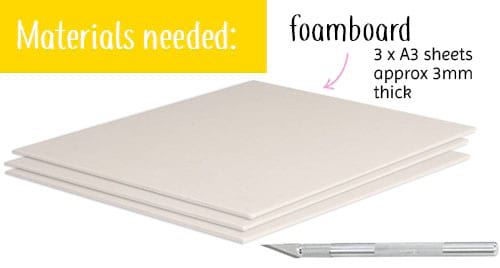
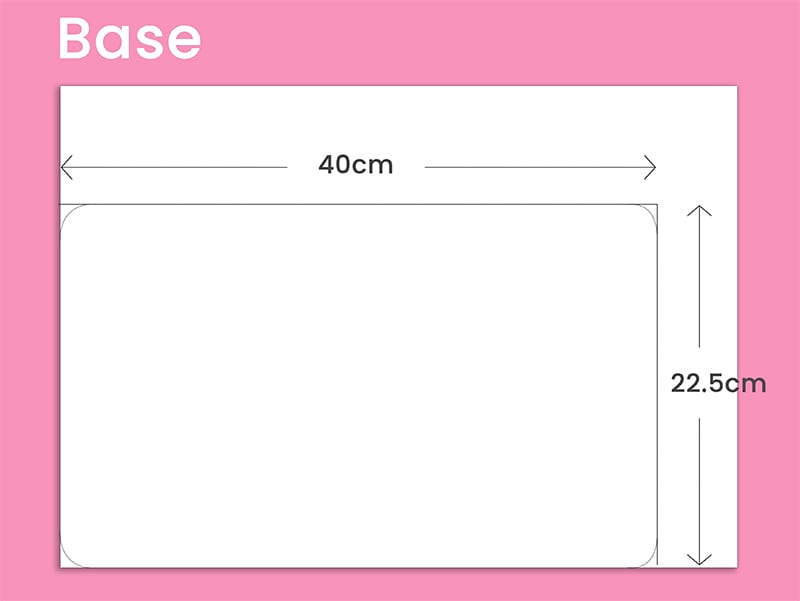
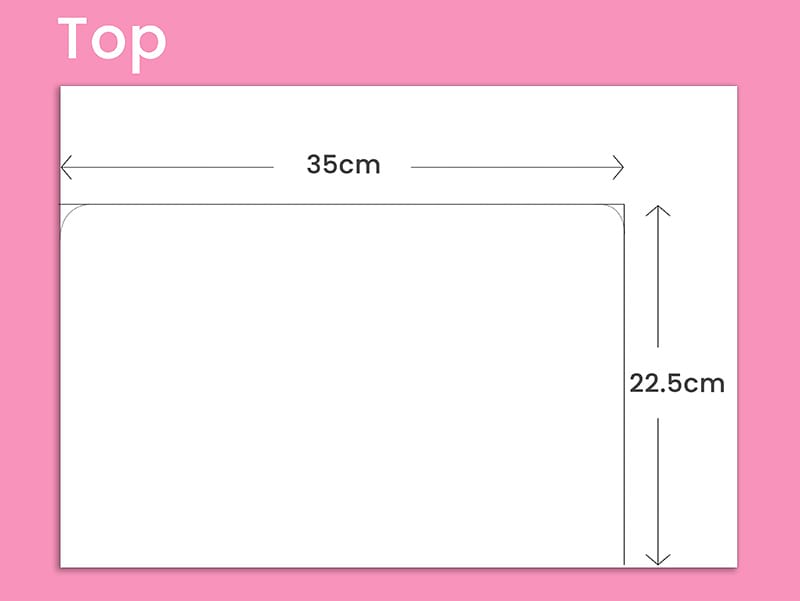
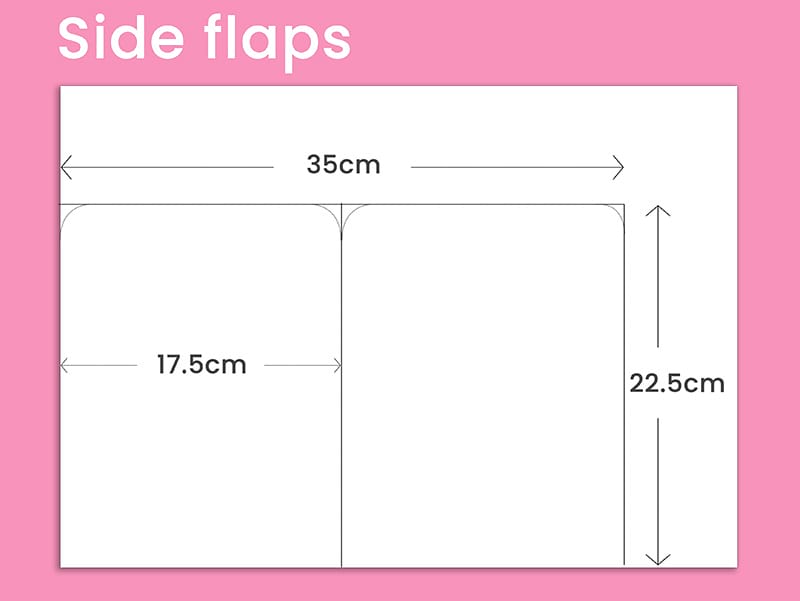
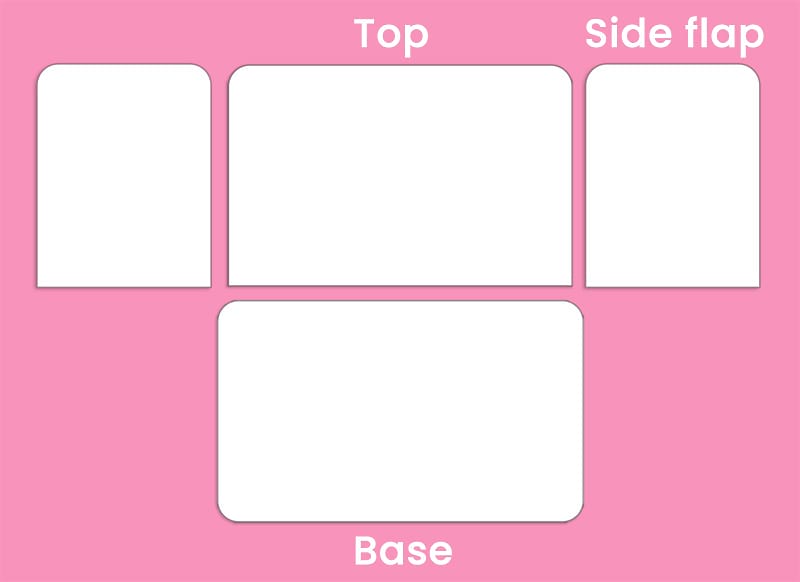
Studio Parts
Start with 3 x A3 foamboards, which are the dimensions I used to make my tabletop studios. The ‘top’ section fits an A4 piece of paper (and magnetic sheet as you’ll see further down). If you’d like a bigger studio, make adjustments as necessary. You’ll see that I’ve rounded off the corners – this was purely an aesthetic choice.
Tip: It’s best to use a craft knife to cut the foamboard. Scissors will be hard work, and also will crush the board.
How they fit together:
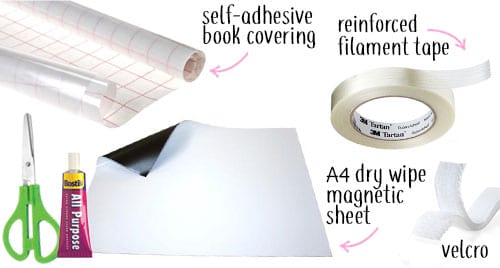
Covering the boards
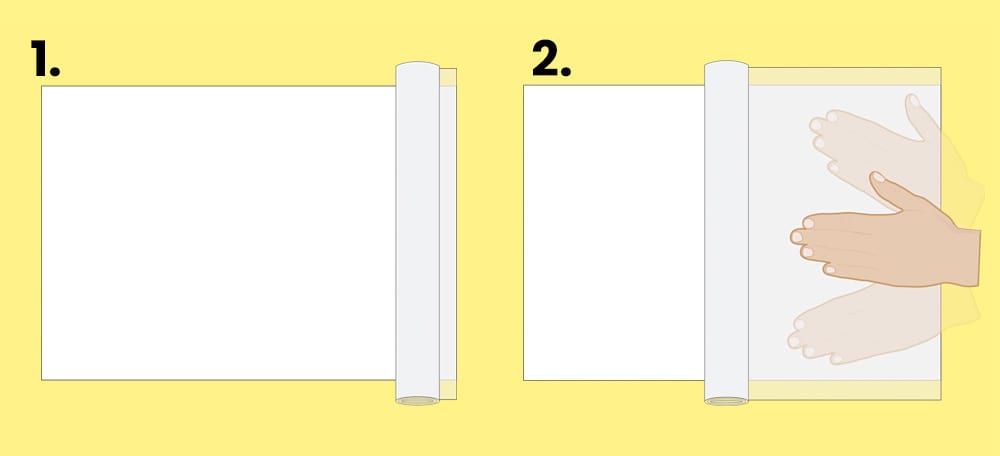
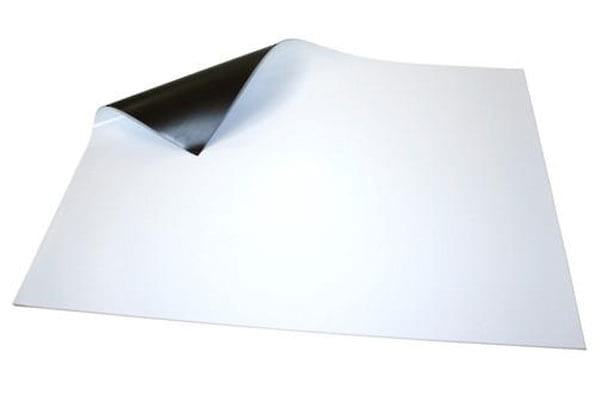
This step can be fiddly, but it is well worth covering the board and base with self-adhesive film. It protects, keeps your studio clean and it will last a lot longer. Before you begin, clear plenty of space to work on your table.
Watch my video below to see how I try to avoid air bubbles.
Play Video
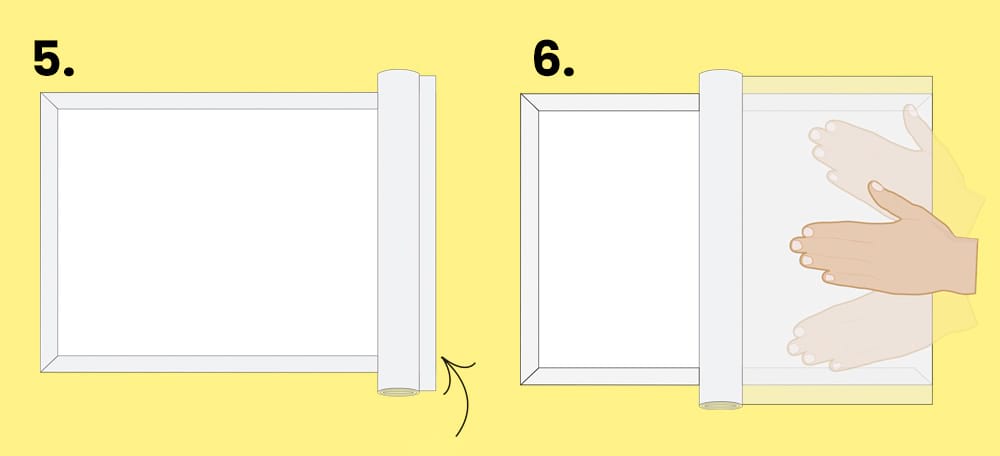
1. Carefully line up the film on one edge of the board.
2. Unroll a little at a time, removing the backing as you smooth out any air bubbles. Gently pulling the roll taut can help.
3. Turn the board over. Cut along the dotted lines.
4. Fold these flaps forward onto the board and smooth down.
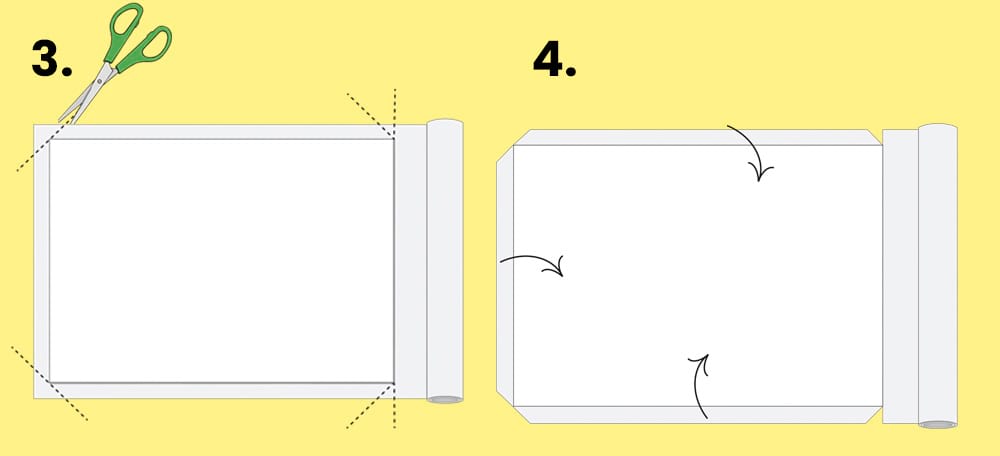
5. Pull the roll over the top. Keep it tight to the edge.
6. Unroll, remove the backing a little at a time whilst smoothing out any air bubbles again.
7. Cut along the dotted lines.
8. Turn the board over. Fold the flaps and smooth onto the board.
9. First board finished! Now cover the others as well as the base.
Assembling the Studio
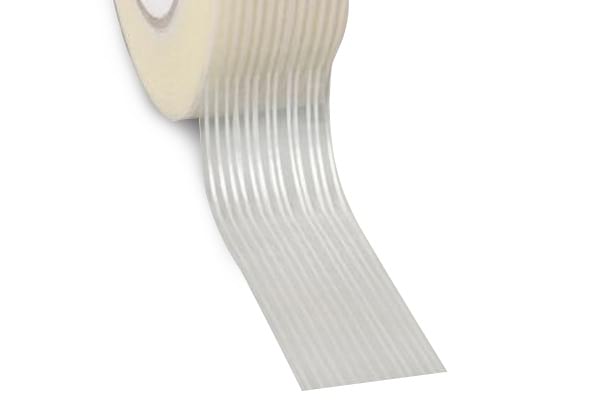
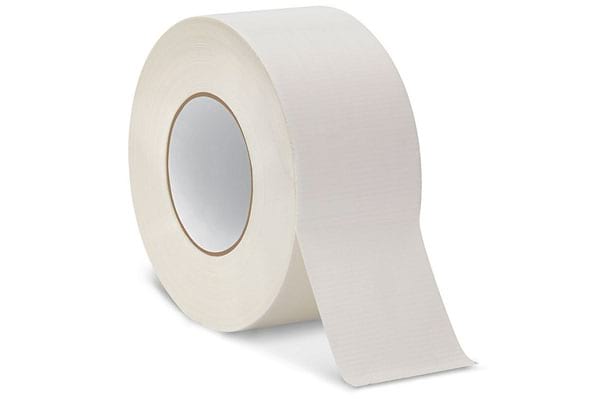
I’ve found from experience that filament tape is better than duct tape for attaching the boards. It’s thinner and more flexible, yet still strong, which is what we’re after for ensuring the studio can easily be folded down and is sturdy when upright.
For our purposes ‘mono’ weave is better than cross weave because it allows for better folding of the studio.
25mm width is perfect.
Play Video
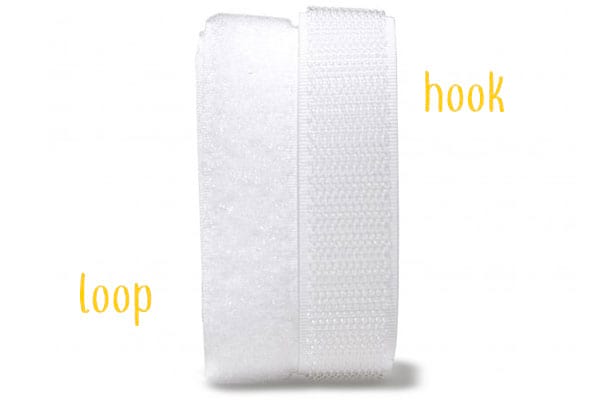
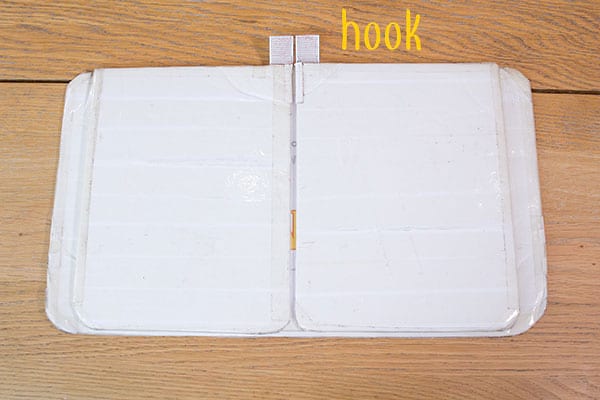
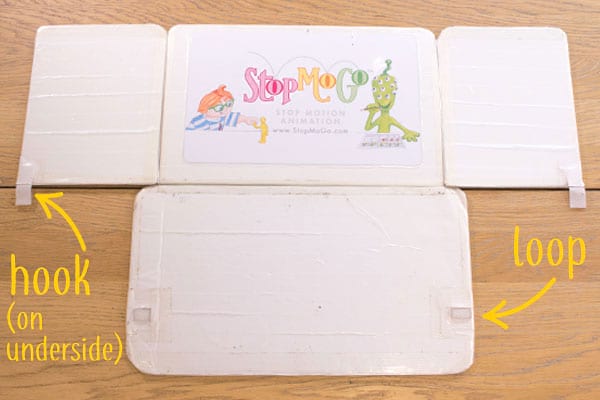
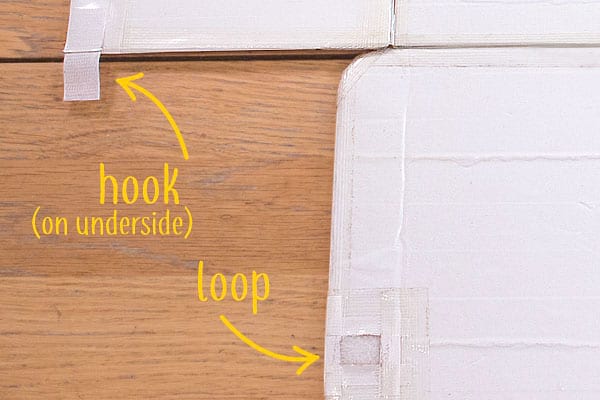
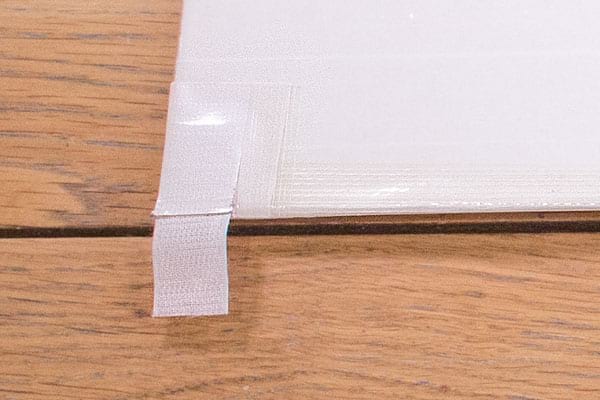
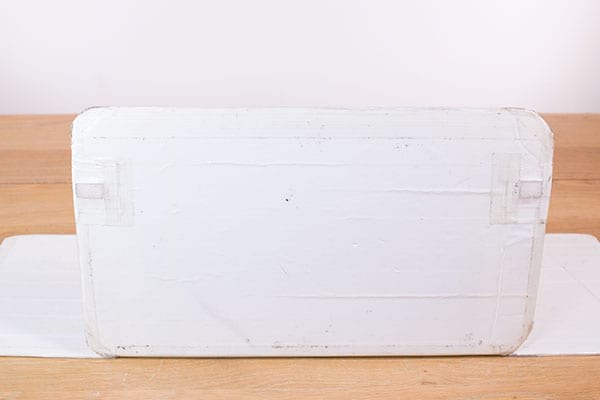
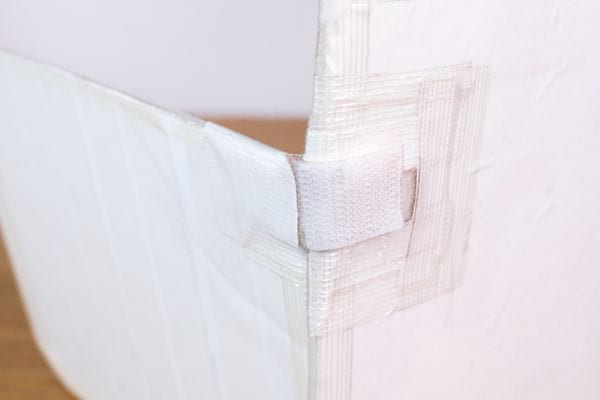
Attaching Velcro flaps
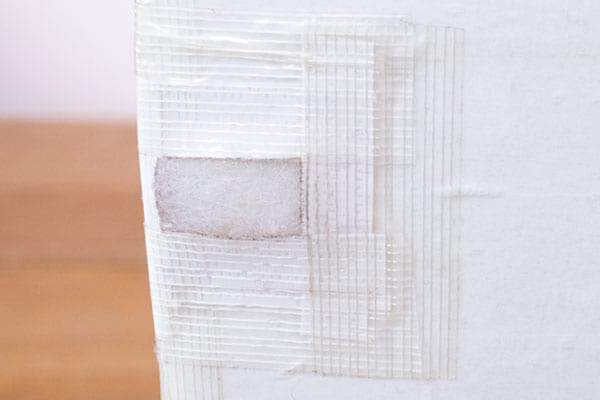
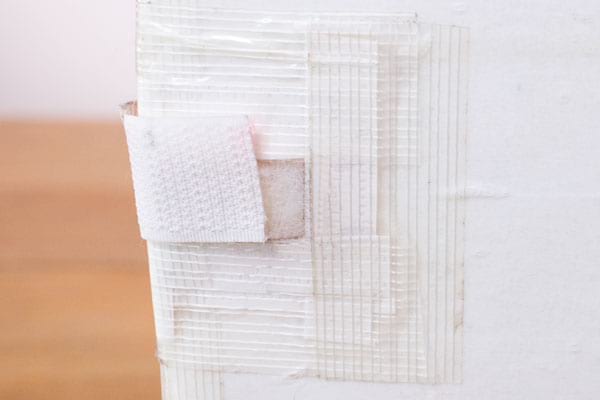
Velcro tabs make the studio quick to put up and take down, as well as holding the studio together securely when you’re animating.
As my studios get lots of use at all of the after school clubs I do, I wanted to ensure the velcro tabs were extra secure, so I used some white duct tape before the filament tape. I also put some strong glue on the velcro on the base.
Use tape to attach the velcro to the side panels and the underside of the base, taking care to ensure they line up when the studio is closed.
Put several layers of tape to make sure the velcro stays on.
Play Video
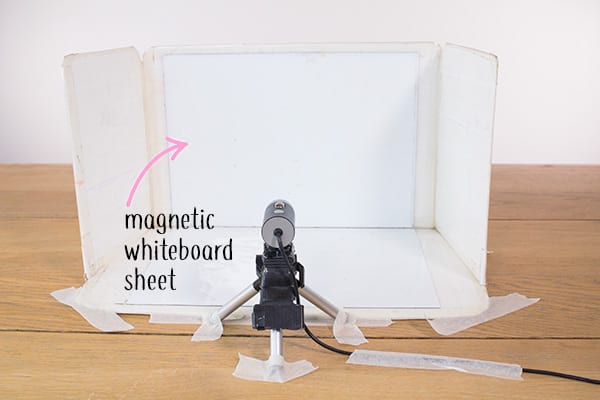
Magnetic Whiteboard sheet
Having a built-in magnetic whiteboard in the studio is a great feature. It will be really handy for a lot of the activities in this workshop.
You could use masking tape to secure a mini whiteboard if you can’t get hold of these sheets.
I used strong glue to attach the sheet to the studio.